Fixing the Blog - Adding View Count to the Blog
Introduction
Previously, while creating the blog, I had added a view count counter in Creating a Blog - 11. Adding View Count. However, due to numerous errors, I had removed it. I will recreate it now.
I referenced the article Adding a View Counter to your Next.js Blog.
Upstash Redis offers 10,000 free usage requests per day, and since it operates on a NoSQL key-value basis, I deemed it suitable for a view count counter. Additionally, as this is an article from Upstash's official blog, I assessed its reliability to be high.
1. Basic Setup
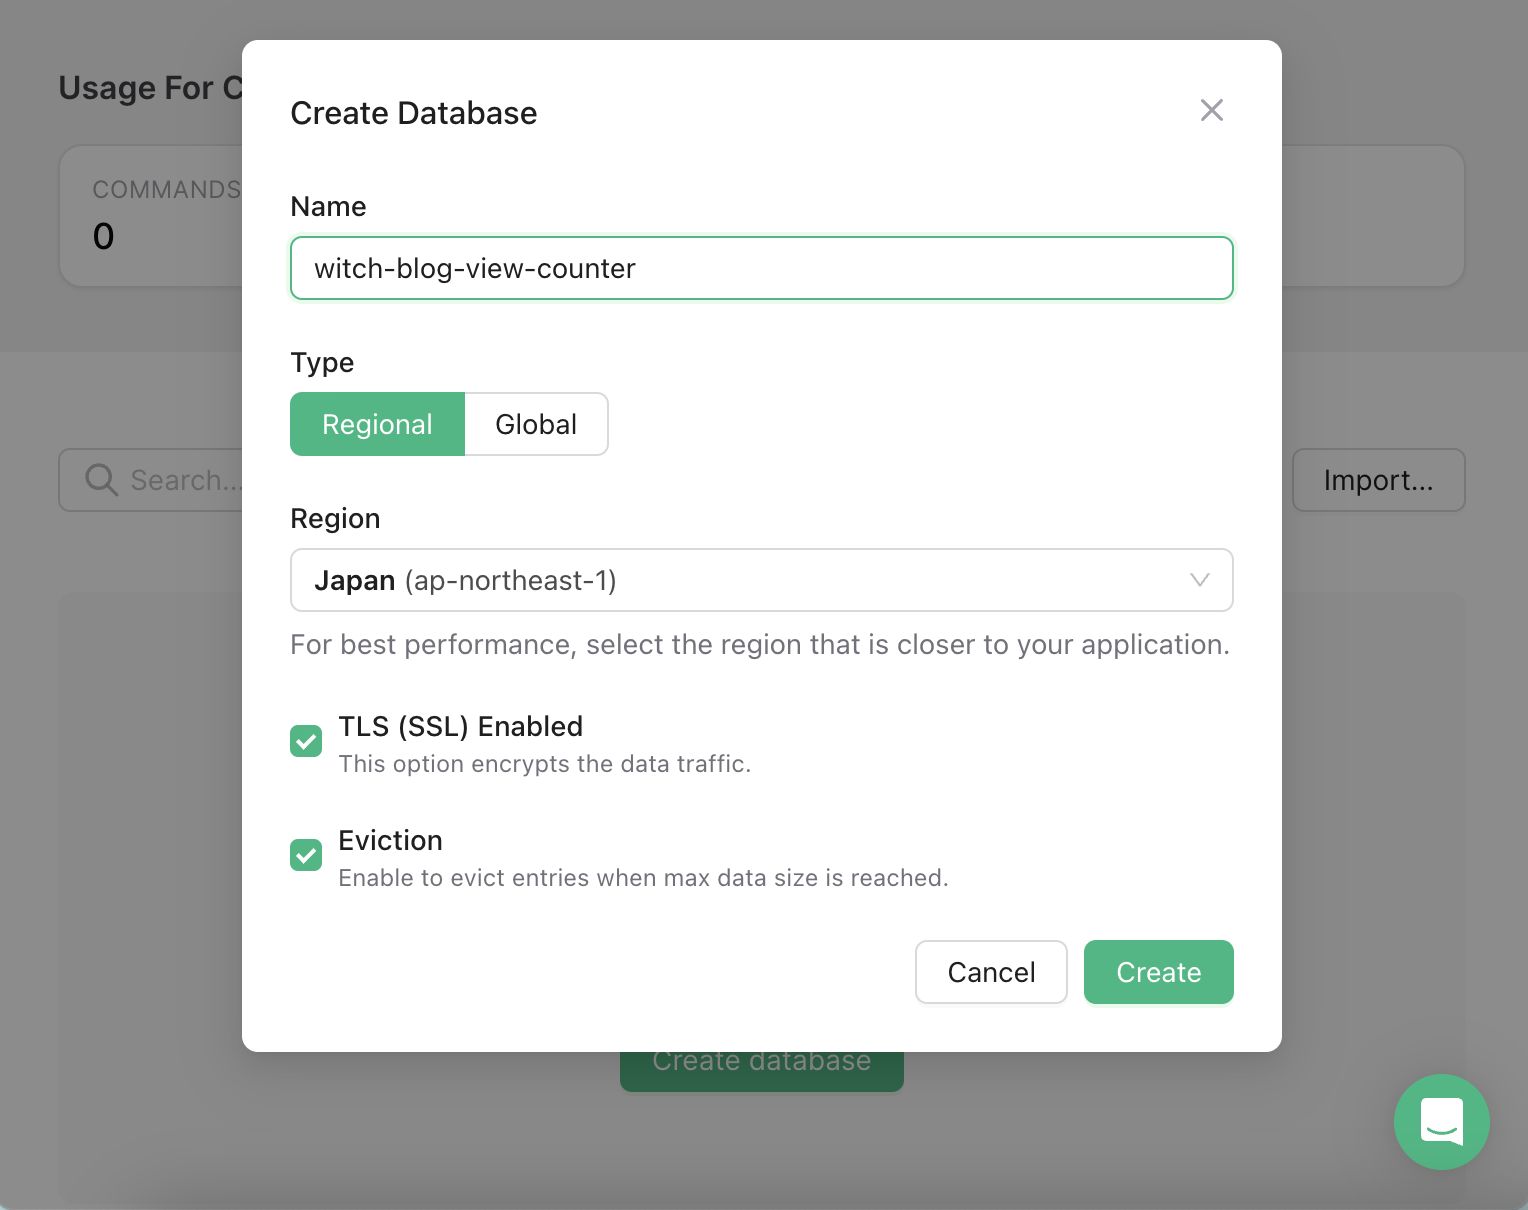
First, log in to Upstash (I used Google login) and create a new database in the Upstash Console. I named it witch-blog-view-counter and selected the Japanese region, which seemed to be the closest.
I enabled traffic SSL encryption and the setting to reject requests that exceed the max size.
Then, add the REST connection information from the DB dashboard into your .env.local file.
UPSTASH_REDIS_REST_URL=...
UPSTASH_REDIS_REST_TOKEN=...
Next, install the Redis package. This completes the basic setup.
yarn add @upstash/redis
2. View Count Increment Logic
Let's create a route handler to implement the logic for incrementing the view count. Create app/viewcount/route.ts to accept POST requests at /viewcount.
Redis.fromEnv() automatically reads UPSTASH_REDIS_REST_URL and UPSTASH_REDIS_REST_TOKEN from environment variables to instantiate a Redis client.
This function retrieves slug from the request body and increments the value of the key pageviews:projects:${slug} by 1. The incr command initializes the key to 0 if it does not exist and then adds 1.
// app/viewcount/route.ts
import { Redis } from '@upstash/redis';
import { NextRequest, NextResponse } from 'next/server';

const redis = Redis.fromEnv();

export async function POST(request: NextRequest): Promise<NextResponse> {
  const body = await request.json();
  const slug = body.slug as string | undefined;

  // If slug is missing from the body
  if (!slug) {
    return new NextResponse('Slug not found', { status: 400 });
  }

  await redis.incr(['pageviews', 'projects', slug].join(':'));
  return new NextResponse(null, { status: 202 });
}
2.1. Preventing Duplicates
Currently, there is no handling for duplicate requests in the view count increment logic. To address this, we will prevent duplicate requests based on the user's IP address.
This can be implemented using either request.ip or the X-Forwarded-For header. Although users may manipulate this, it suffices for our needs as we are not seeking extreme accuracy in managing the view count.
However, storing the IP address directly could pose security issues, so we will hash and store it instead. We can use the crypto package for this. The hash value of the IP can be generated as follows.
const ip = request.ip ?? request.headers.get('X-Forwarded-For');

if (ip) {
  // Hash the IP and turn it into a hex string
  const buf = await crypto.subtle.digest('SHA-256', new TextEncoder().encode(ip));
  const hash = Array.from(new Uint8Array(buf))
    .map((b) => b.toString(16).padStart(2, '0'))
    .join('');

  // ...
}
Next, we will create a key that starts with deduplicate: and send a set request to store a value of true. The key should be retained for 60 * 60 seconds (1 hour) and should only have its value written if it expires. This can be accomplished using the NX option and the EX expiration time option.
Moreover, the view count should only increment if there is no duplicate IP or if the IP is absent. The complete implementation of the POST handler is as follows.
export async function POST(request: NextRequest): Promise<NextResponse> {
  const body = await request.json();
  const slug = body.slug as string | undefined;

  if (!slug) {
    return new NextResponse('Slug not found', { status: 400 });
  }

  const ip = request.ip ?? request.headers.get('X-Forwarded-For');

  if (ip) {
    // Hash the IP and turn it into a hex string
    const buf = await crypto.subtle.digest('SHA-256', new TextEncoder().encode(ip));
    const hash = Array.from(new Uint8Array(buf))
      .map((b) => b.toString(16).padStart(2, '0'))
      .join('');

    const isNewView = await redis.set(['deduplicate', hash, slug].join(':'), true, {
      nx: true,
      ex: 60 * 60,
    });
    if (!isNewView) {
      return new NextResponse(null, { status: 202 });
    }
  }

  await redis.incr(['pageviews', 'projects', slug].join(':'));

  return new NextResponse(null, { status: 202 });
}
2.2. View Count Increment Component
Now, let's create a component to handle the view count increment task. The component named ViewReporter will accept slug as a prop. As we will use the useEffect hook, it should be defined as a client component and return null since there will be no rendering.
// components/ViewReporter.tsx
'use client';

import { useEffect } from 'react';

function ViewReporter({ slug }: {slug: string}) {
  useEffect(() => {
    fetch('/viewcount', {
      method: 'POST',
      headers: {
        'Content-Type': 'application/json',
      },
      body: JSON.stringify({ slug }),
    });
  }, [slug]);

  return null;
}

export default ViewReporter;
3. Applying the View Count Counter
Next, where should we check the view count and for what? Initially, I will display the total number of visitors on the homepage and show the view counts for each post.
3.1. Total Visits
To aggregate the total visits to the blog, we apply ViewReporter in the root layout of Next.js. The slug is set to witch-blog:total-views.
// app/layout.tsx
export const totalViewSlug = 'witch-blog:total-views';

export default async function RootLayout({
  // Layouts must accept a children prop.
  // This will be populated with nested layouts or pages
  children,
}: {
  children: React.ReactNode
}) {
  // await generateRssFeed();

  return (
    <html lang='en' style={{ colorScheme:'dark' }} suppressHydrationWarning>
      <body>
          <ViewReporter slug={totalViewSlug} />
          {/* ...omitted... */}
      </body>
    </html>
  );
}
3.2. Displaying Total Visits
Next, let's create a simple component for displaying the total visits, called ViewCounter.
function ViewCounter({ view }: {view: number}) {
  return (
    <p className={styles.counter}>Total Visits: {view} times</p>
  );
}
On the homepage, we will fetch the view count for the slug corresponding to the total visitors and display it. We will also set the route cache revalidation time to 60 seconds.
const redis = Redis.fromEnv();

// cache revalidation time
export const revalidate = 60;

async function Home() {
  const totalViews = await redis.get<number>(['pageviews', 'projects', totalViewSlug].join(':')) ?? 0;
  return (
    <>
      <ViewCounter view={totalViews} />
      {/* ...omitted... */}
    </>
  );
}
3.3. Post Views
Now that we have the component to show the content of the blog posts located in app/posts/[slug]/page.tsx, we just need to increment the view count for the corresponding [slug] and display it.
type Props={
  params: {slug: string}
};

const redis = Redis.fromEnv();

export const revalidate = 60;

async function PostPage({ params }: Props) {
  // Other blog logic omitted

  const slug = params.slug;

  const totalViews = await redis.get<number>(['pageviews', 'projects', slug].join(':')) ?? 1;

  return (
    <>
      <ViewReporter slug={slug} />
      <ViewCounter view={totalViews} />
      {/* ...omitted... */}
    </>
  );
}

export default PostPage;
In the future, we could consider adding functionality for sorting posts by popularity or displaying posts with the highest view counts once we accumulate more data based on the database.
References
Adding a View Counter to your Next.js Blog
Nextjs Route Handlers Official Documentation
NextRequest Official Documentation
Step-by-Step Blog Creation - Counting Views